
Scrolling and Zooming
While recording some sound, you have seen how the horizontal axis shows the time of the
recording, and the vertical axis shows the frequency of the pitch at any given time.
Once your recording gets longer than a few seconds, you might want to choose which part of
the recording you currently see. This can be done with scrolling and zooming the visible time
range. Also, depending on the content that you are currently working with, you might want to
change the visible frequency range. In this section we will do both.
Let’s load a sample file so that you can follow this tutorial and see exactly the same
screens as shown here . Click on → and select the file “A01_male_intervals.flac”.
After you have opened the file, click on the profile list and select the
“Quickstart”
profile again to ensure your view matches the following screenshots. Remember
that you can always restore the Quickstart or Factory Settings profiles if you want to return the program to the
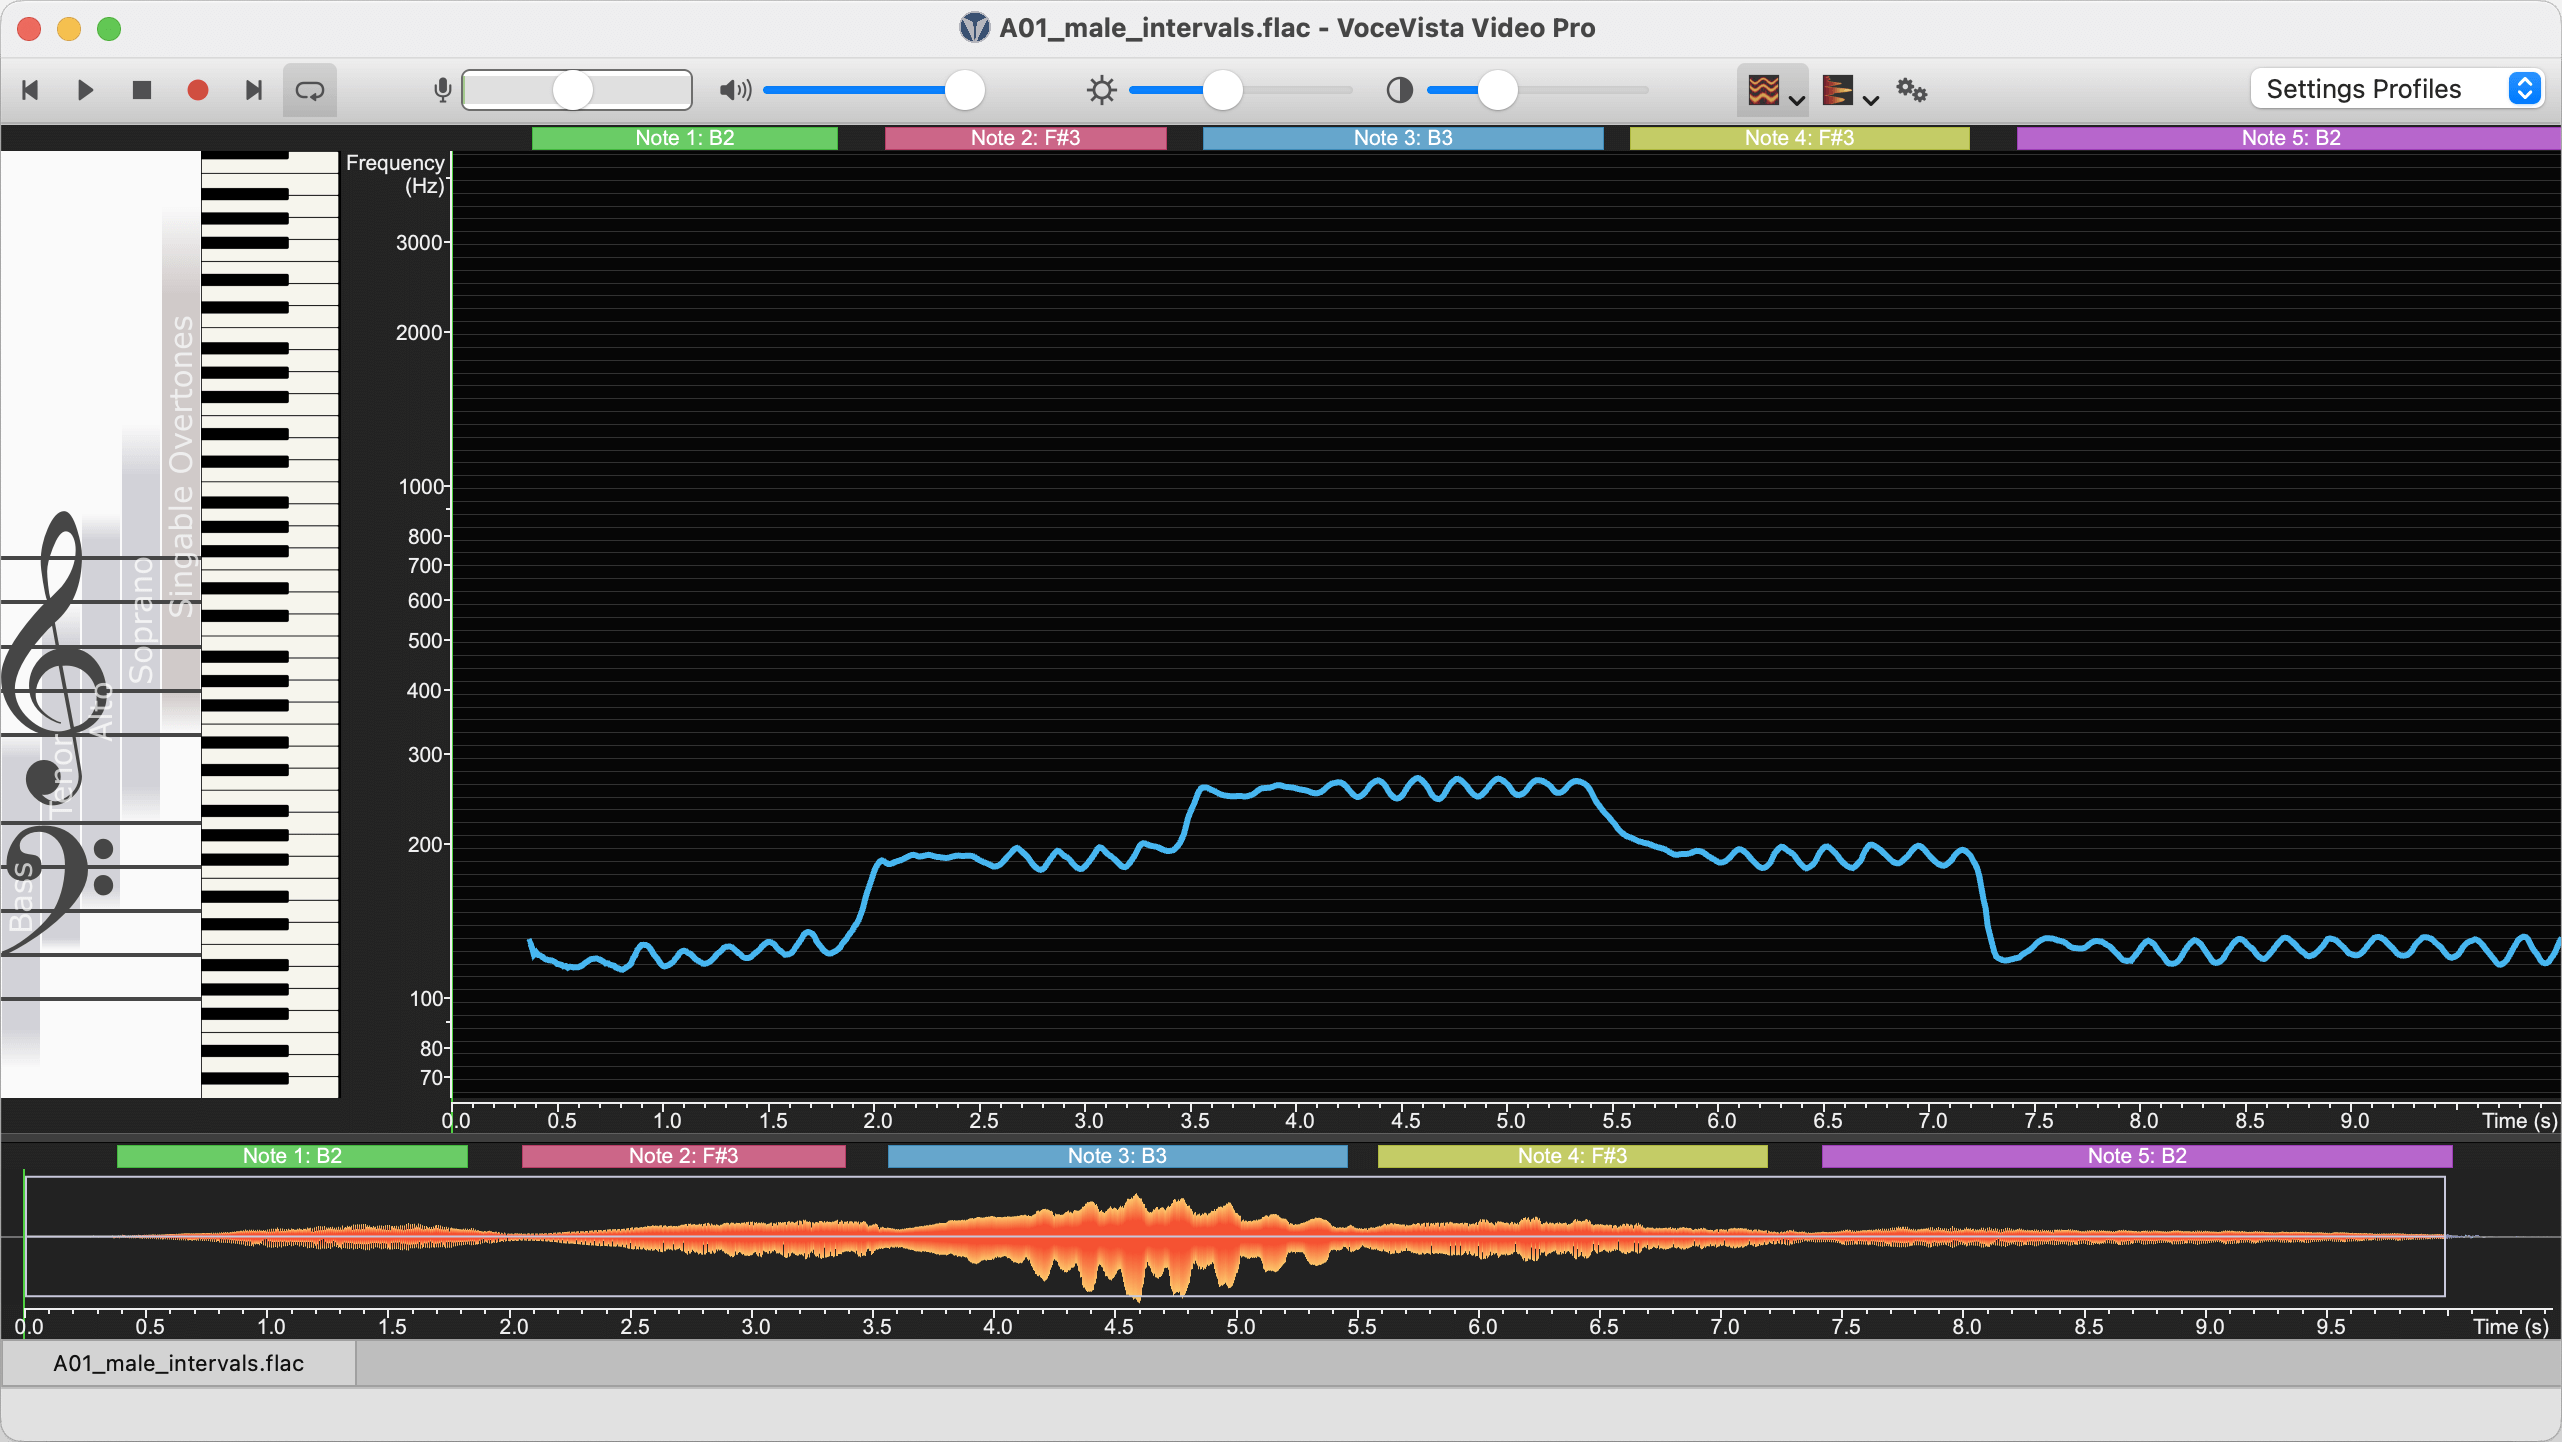
initial state. Your screen should now look like this:
First, let’s listen to the file. Click on the play button on the toolbar ![]() or press Space to start playback. You can
or press Space to start playback. You can
adjust the loudness on the output volume slider on the toolbar. Listen to the recording and
then press Space again when you are done to stop playback.
In this sample, the singer is singing a triad consisting of three different musical
notes. Let’s zoom in to see precisely which notes those are, and how accurately the singer
was singing them.
Let’s examine the first sung note more closely.
Press and hold the button of your trackpad or mouse, and move the pointer over the blue
pitch line. Notice how this moves the green time cursor line. The current time position is
displayed on the status bar at the bottom of the window, along with details about the
current pitch frequency and musical note at that point in time.
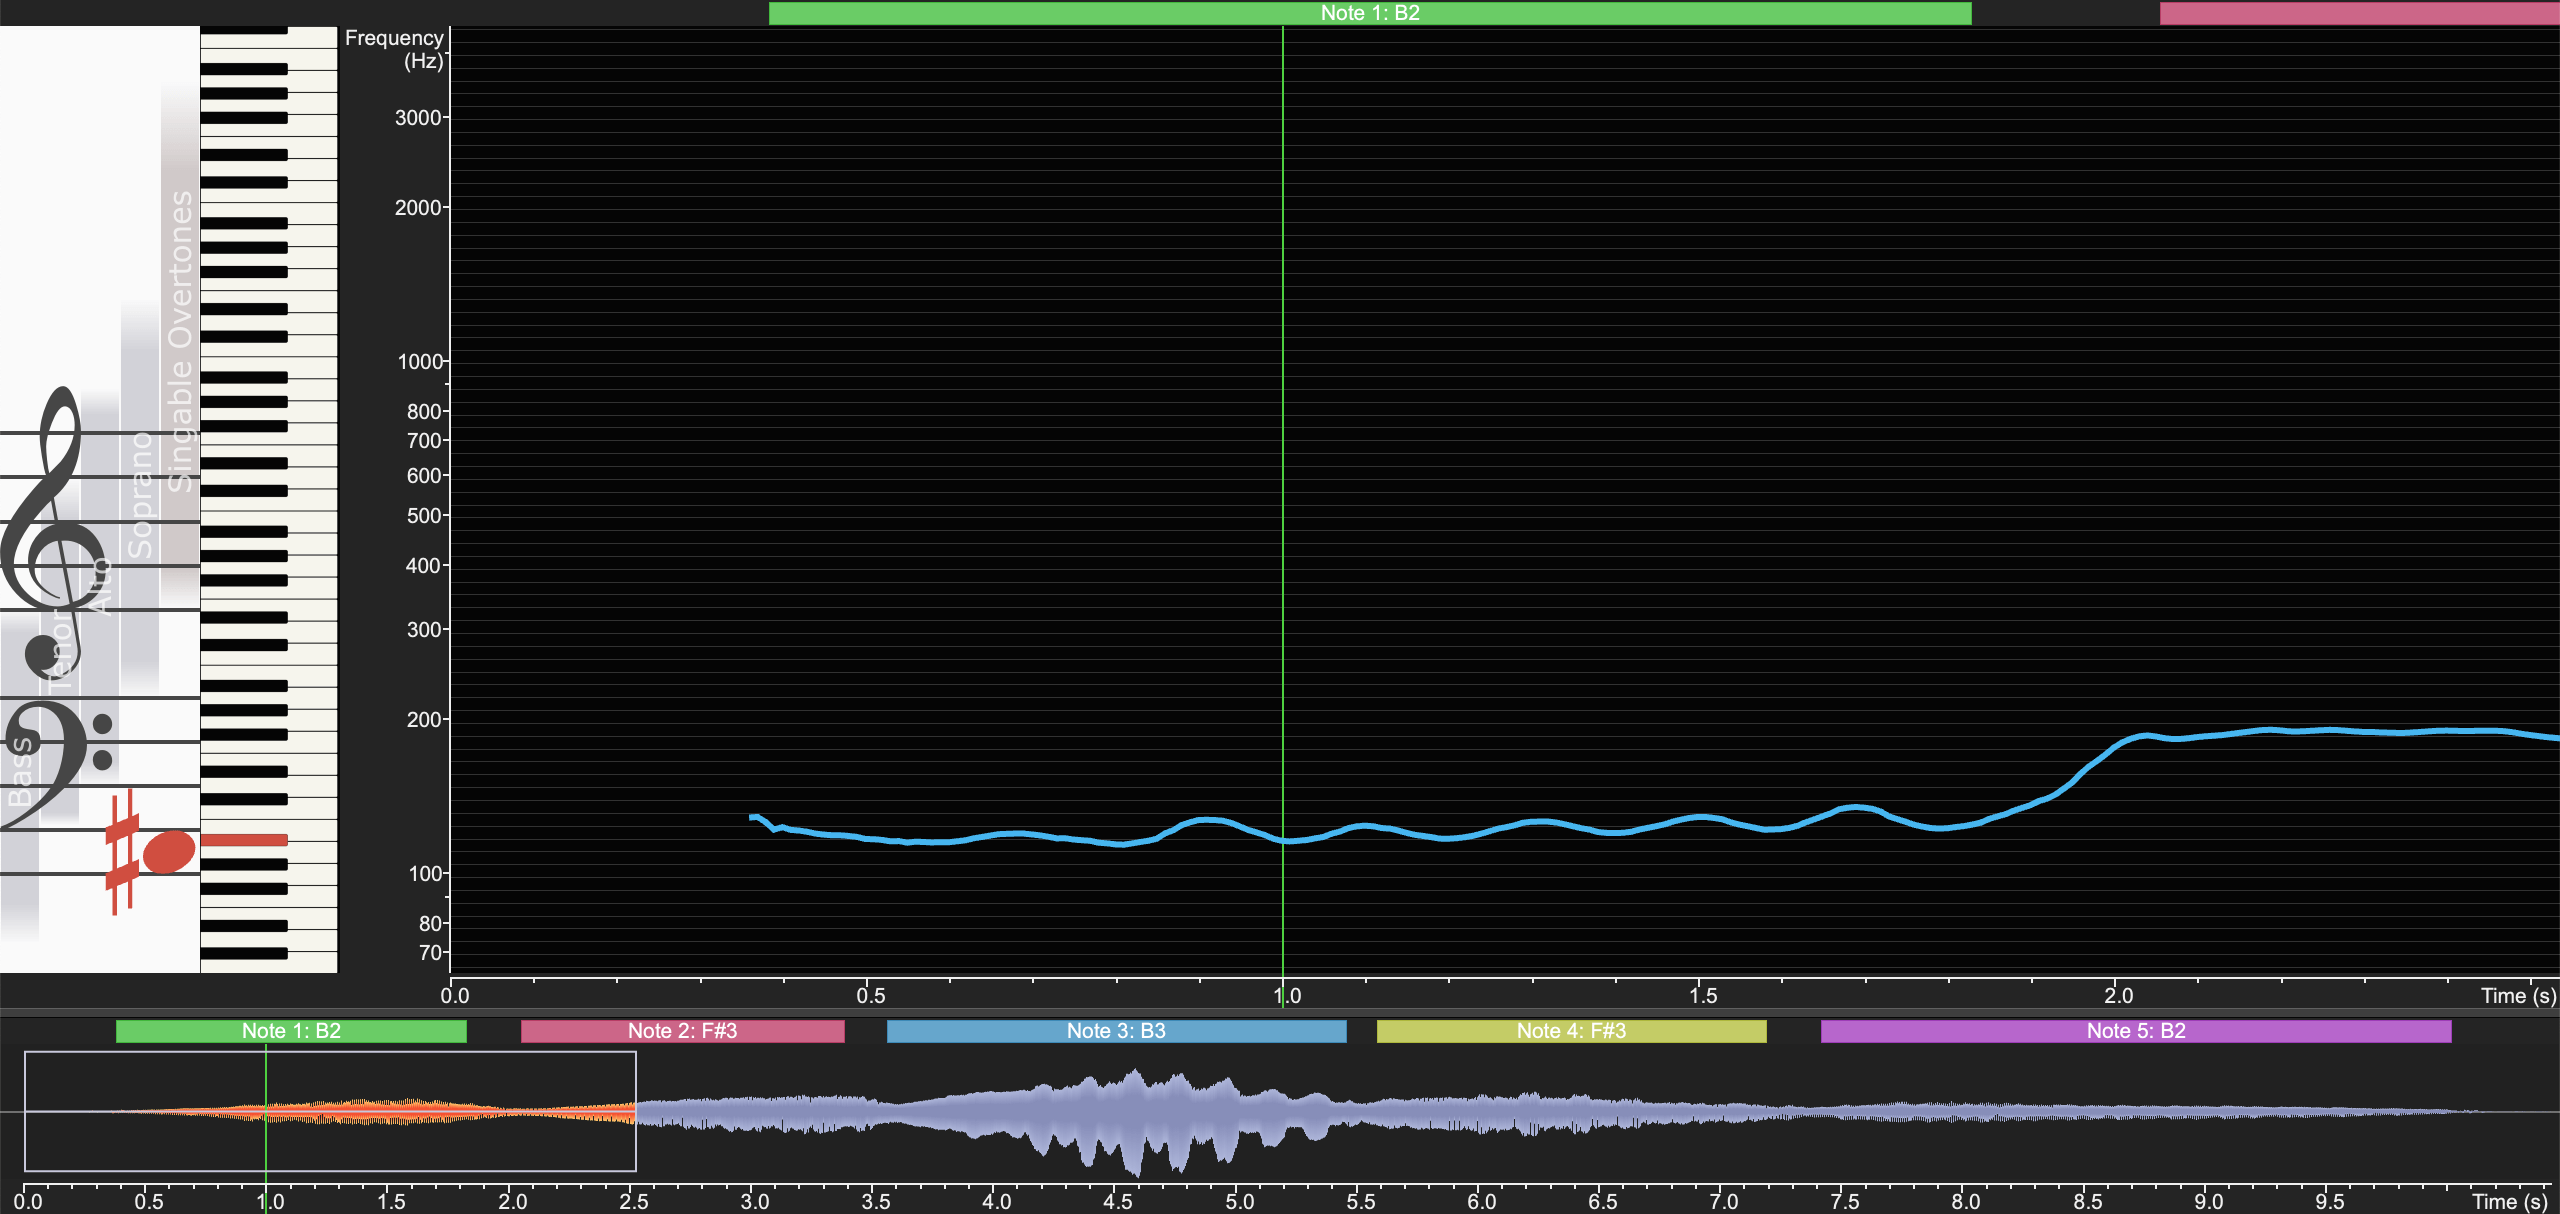
Move the green time cursor line to be exactly at the time point “1.0 seconds”. Now click on the menu → or press the 1 key to zoom in the current time range. Do this one more time. Now you should see something like this:
Besides using the menu command to zoom in, you can also move the pointer over the main window and use the two-finger scroll gesture on your trackpad, or the wheel on your mouse, to zoom in and out.
We have zoomed the time scale so that the first sung note is stretched out over most of
the visible time range. Now we want to zoom in the frequency range to see more details about
the sung pitch on the frequency axis.
Move the pointer over the Frequency Scale just to the right of the piano keyboard. When
pointing at the Frequency Scale, a grey horizontal line appears as a visual aid. Move the
pointer so that the grey line is approximately matching the blue pitch line, and then use
the two-finger scroll gesture on your trackpad, or rotate the wheel on your mouse, or press
the 1 and 2 keys on your keyboard, to zoom in the visible
frequency range to go approximately from notes A2 to A3 on the Piano, or 110 Hz to 220 Hz on
the Frequency Scale:
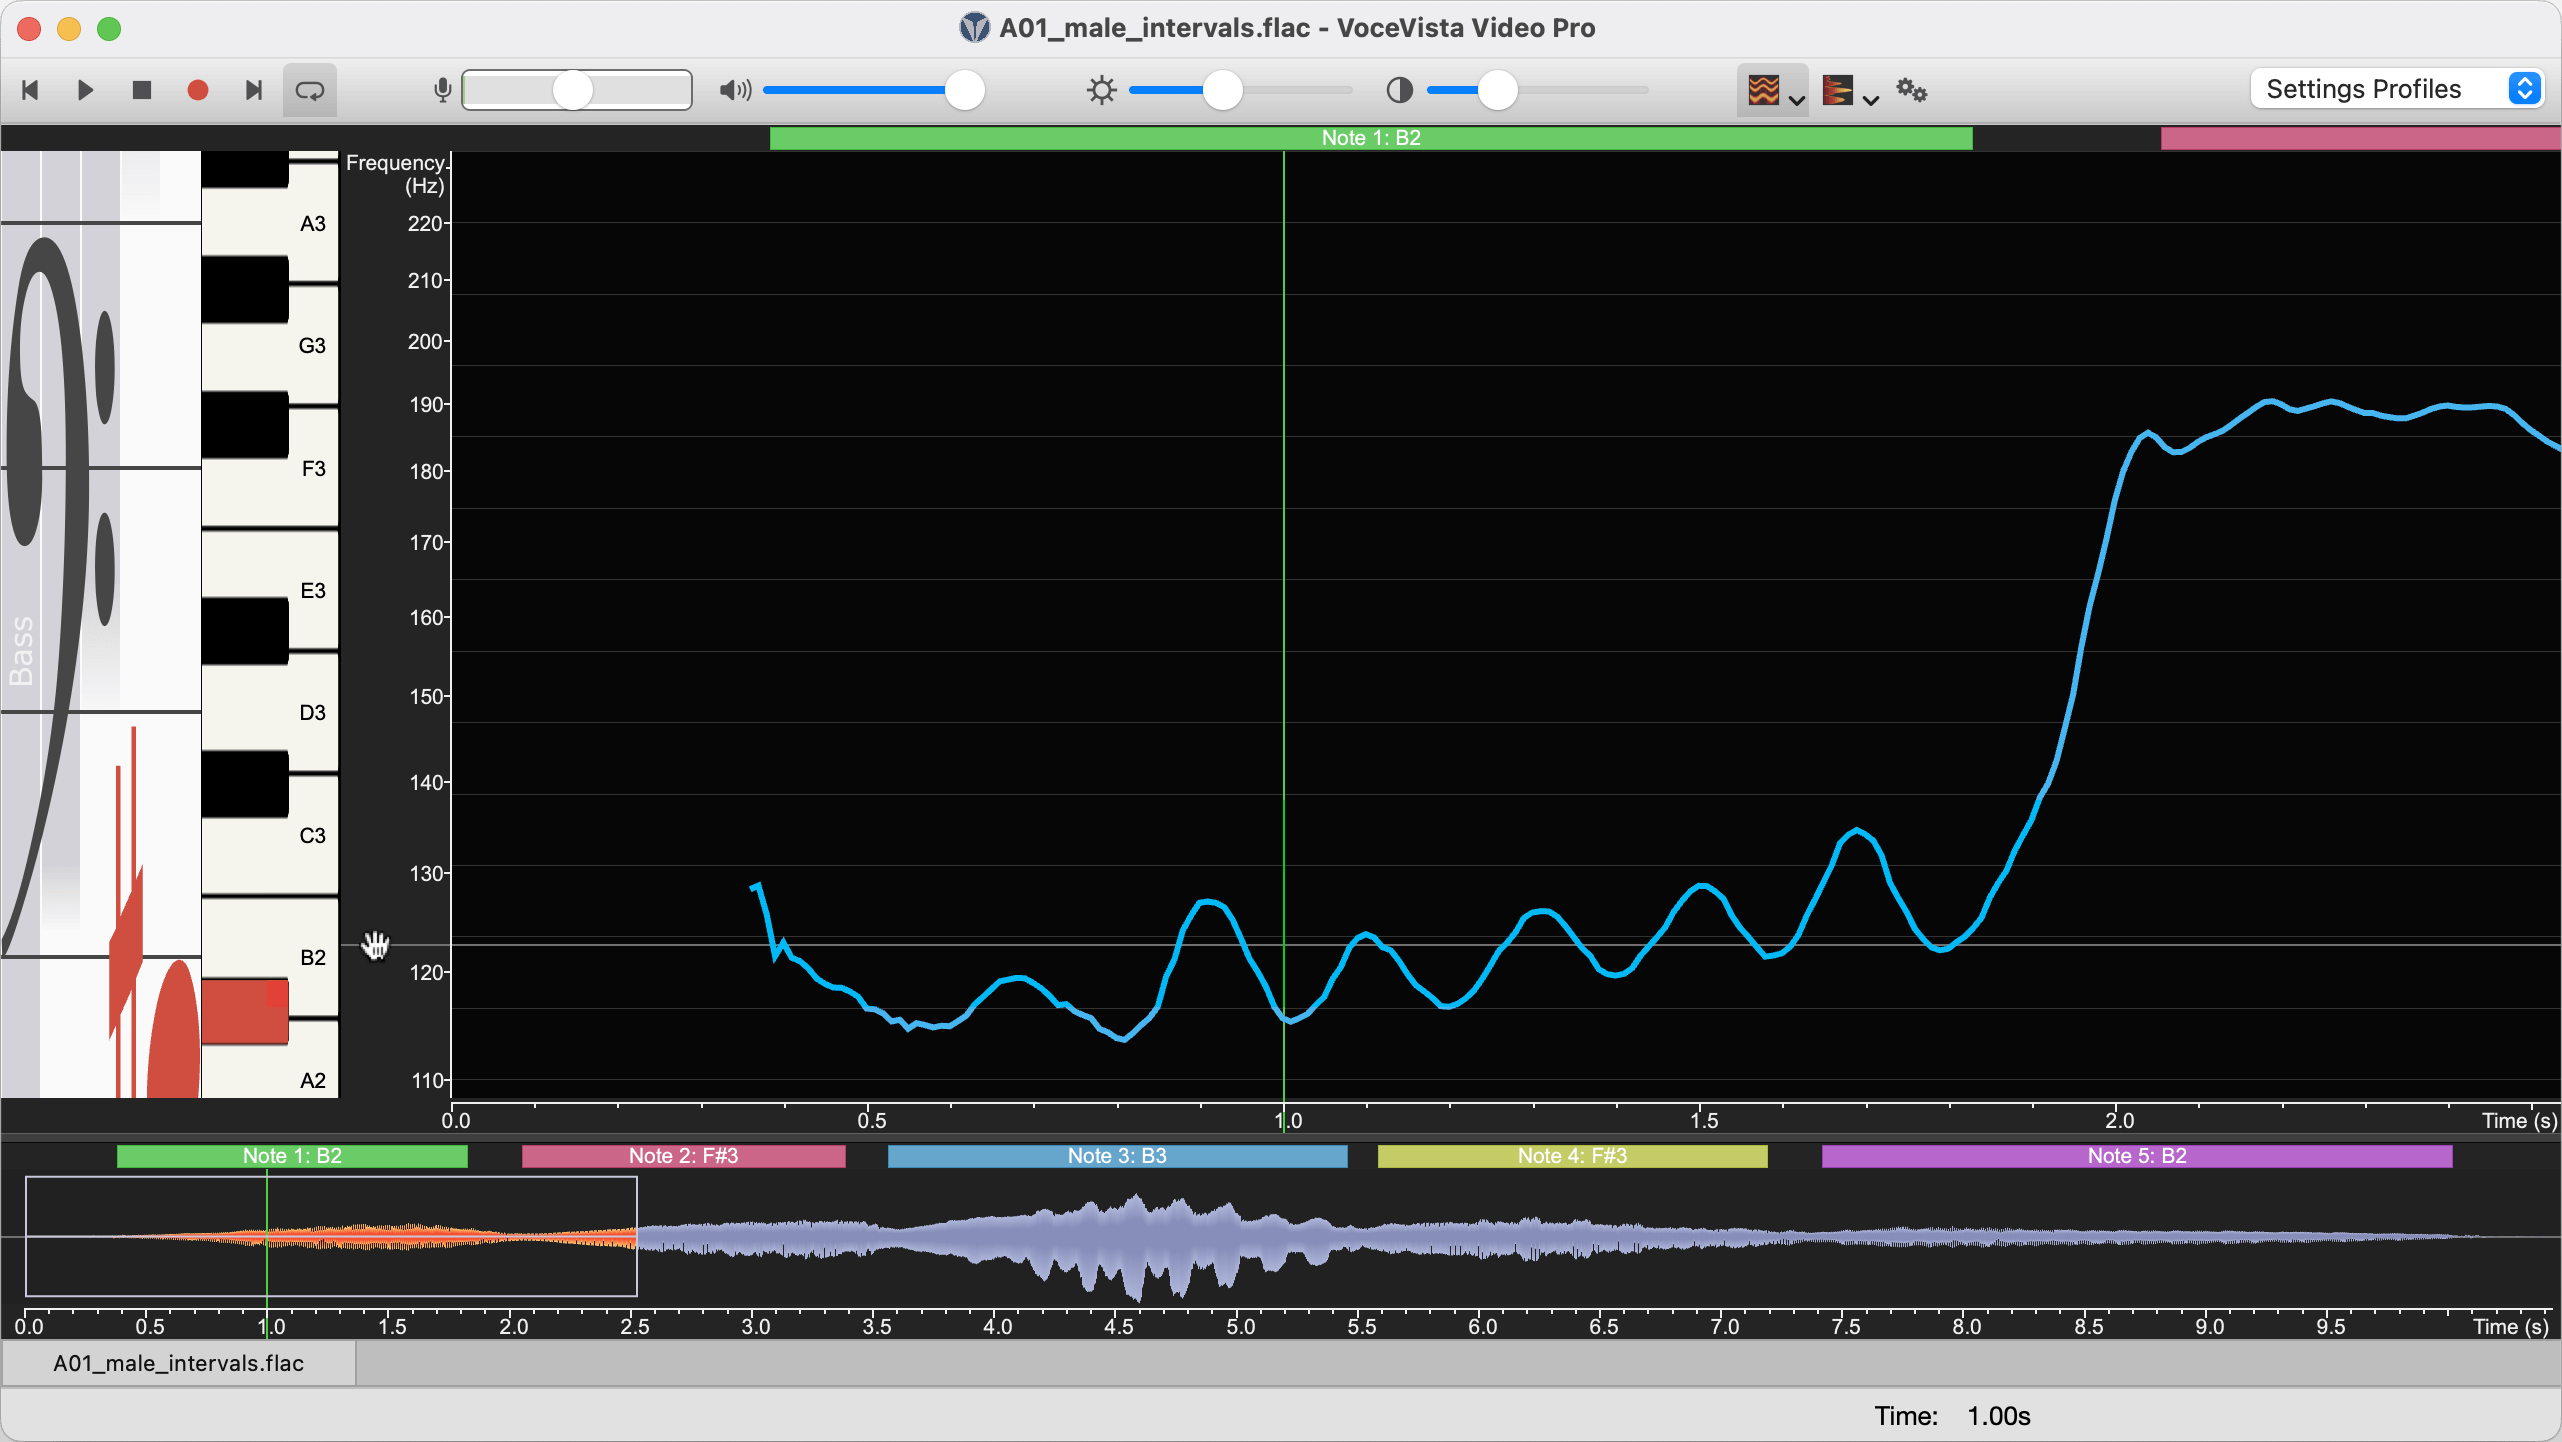
Notice how the blue line is not straight, but is slightly moving up and down. This is
due to the vibrato of the singing voice. Also, it looks like the pitch is rising slightly
throughout the duration of the note. VoceVista Video Pro offers many ways to analyze this in
more detail, but for now we will continue with the fundamentals of using the program.
Now let’s look at other parts of the recording. Move the pointer over the center of the
Time-Range Slider on the Timeline until it changes into a hand. Then click and drag this slider with the mouse until the second note has been scrolled into view:

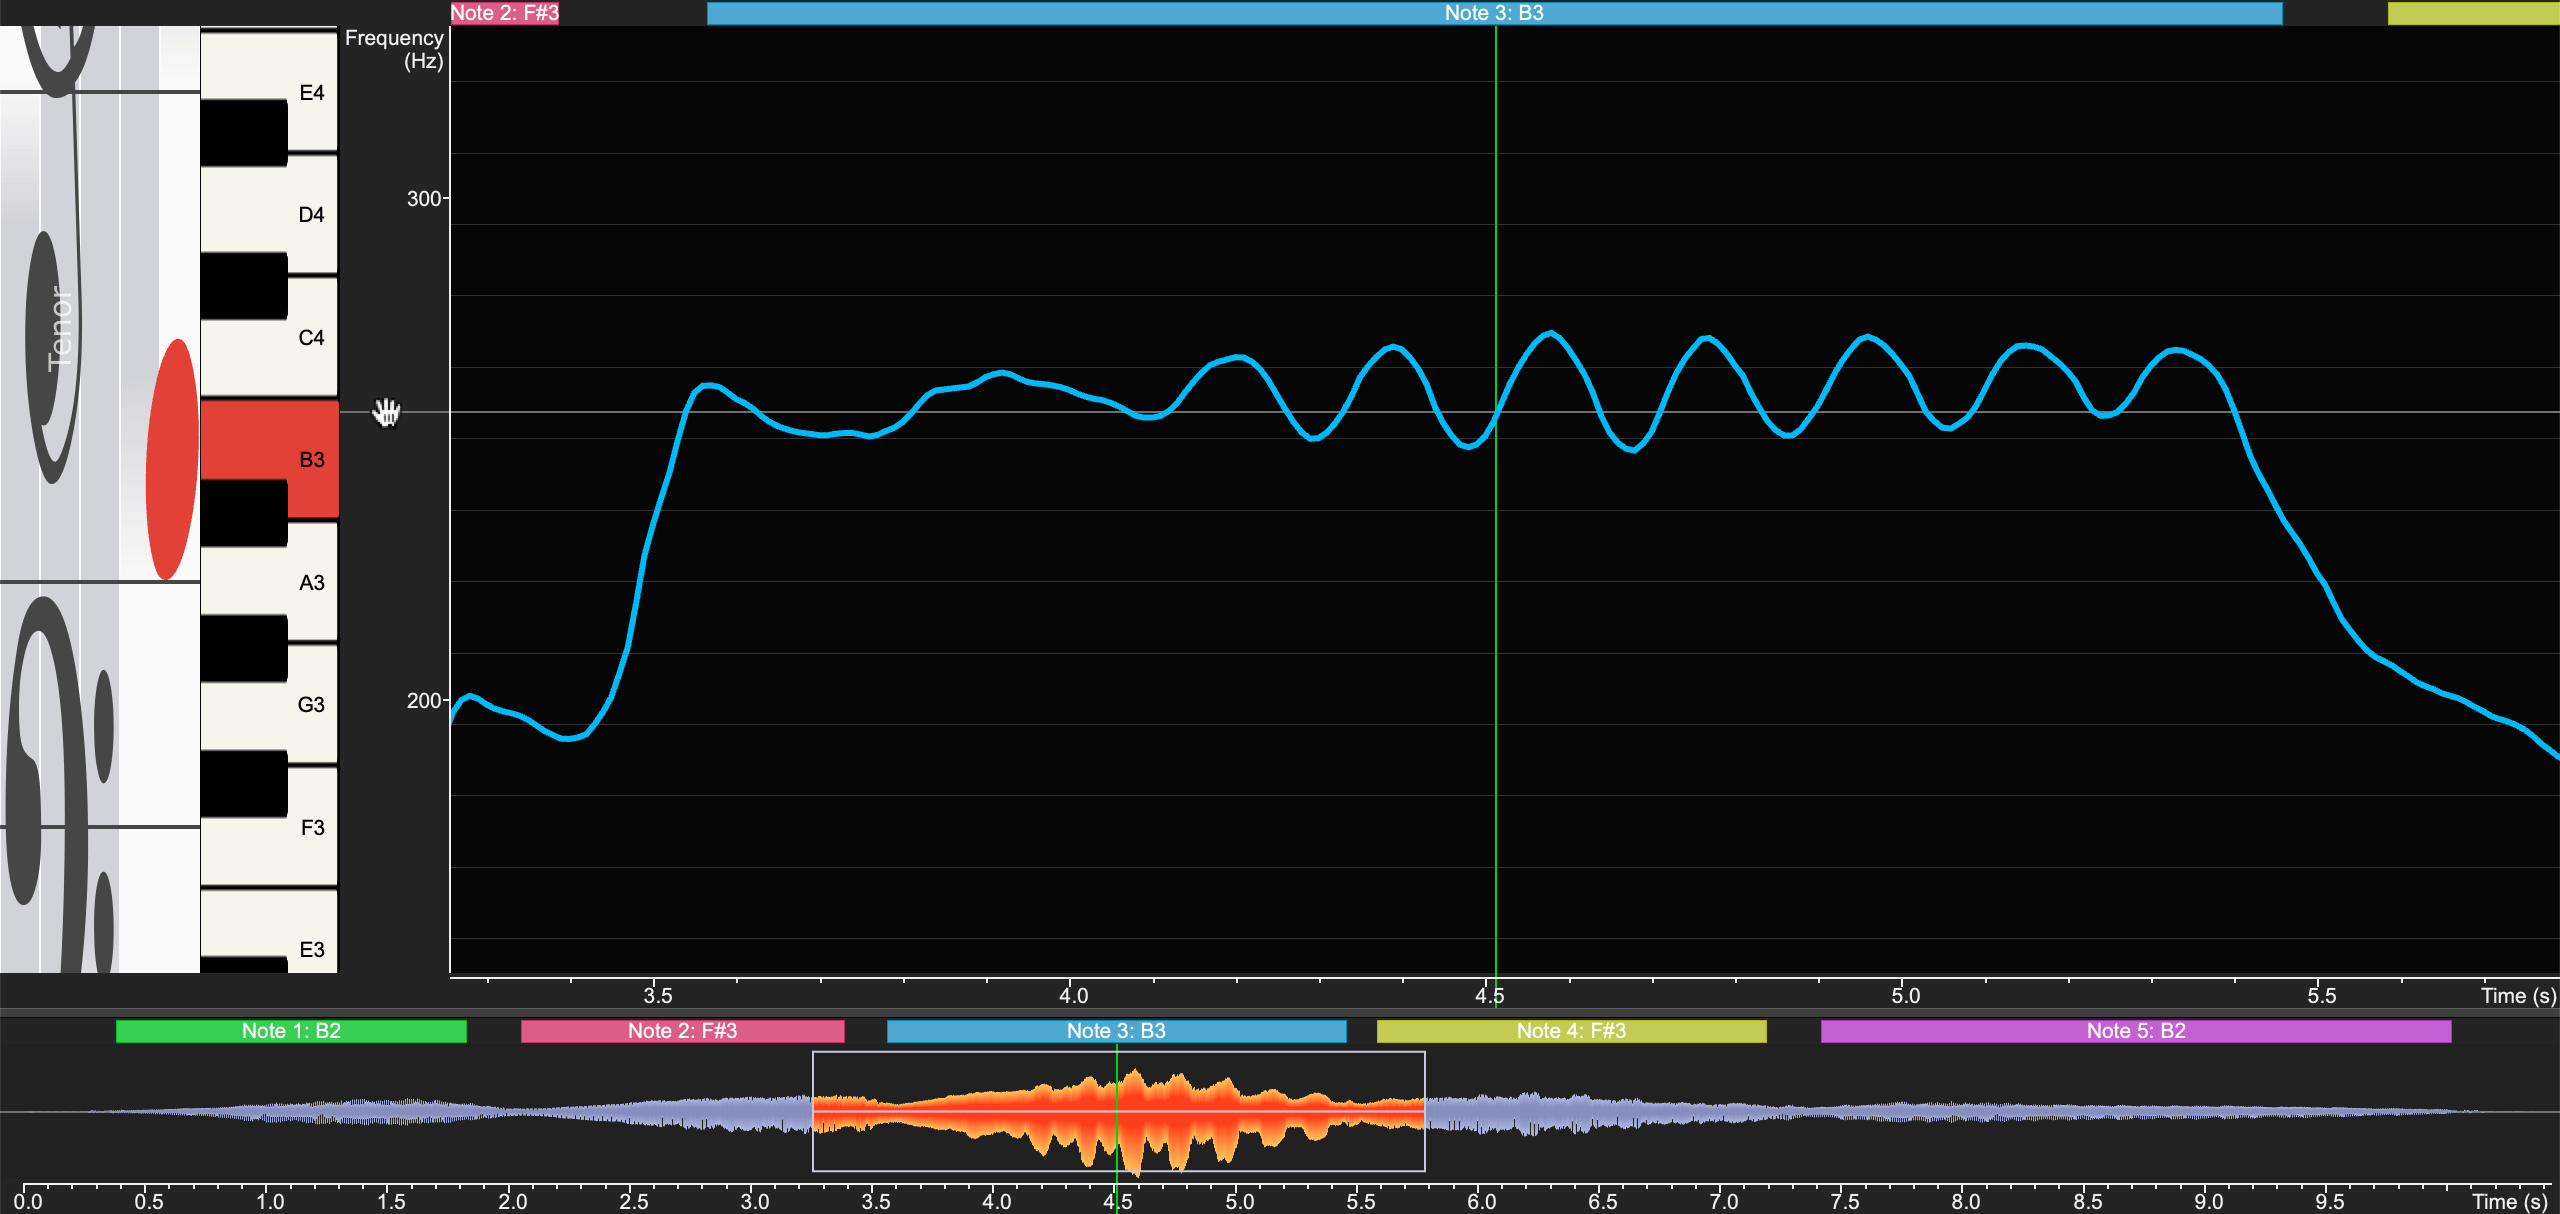
Another way to scroll time is simply to click anywhere on the Timeline to move the
current range to that position. Try that now: Move the pointer over the Timeline, at around
4.5 seconds, and make a single click. This should move the time range to cover the third
note. However, now the pitch of the third note is no longer in view. So point at the
Frequency Scale and drag it down a bit until the pitch line is in view again:
So far we have set the visible ranges on the time and frequency axes by simply scrolling
and zooming those axes with the mouse, and by interacting with the Timeline. If you want to
set a specific frequency range, you can use the Frequency Scale Settings. To set a specific time range, you can click on the menu → to select a specific time range, and then click on → .