Recording
Now you are ready to record some sound. Click the Record button on the toolbar ![]() , or press Ctrl+Space or R to start recording.
, or press Ctrl+Space or R to start recording.
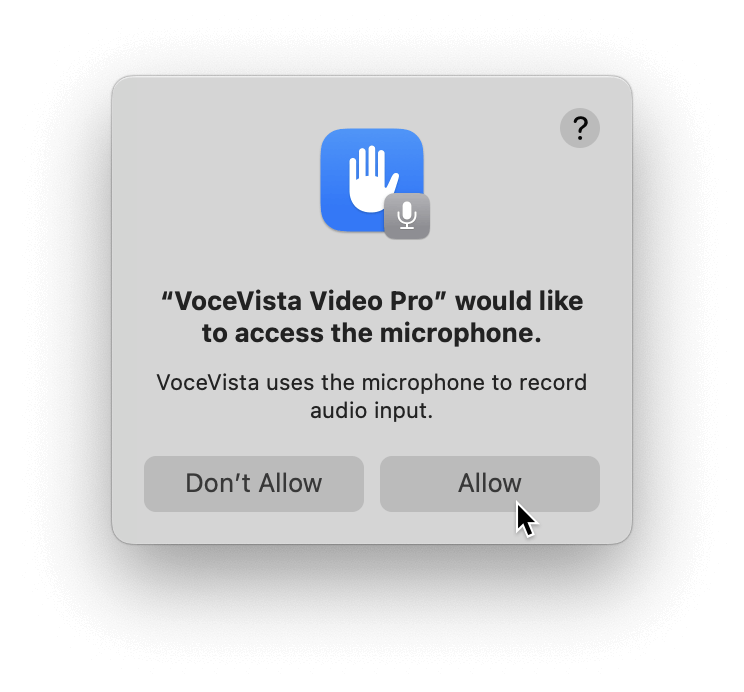
If you are running VoceVista Video Pro on macOS for the first time, there may be a security
prompt asking whether the program is allowed to access the microphone. Click on
to grant microphone access:
If microphone access hasn’t been granted, recording will not work. If that is the case,
you can open the macOS System Settings to grant access later under “Privacy & Security”.
On Windows, there is a similar setting under “PC Settings / Privacy”. For more details,
check our guide
for troubleshooting audio input.
If recording has started successfully, the green time cursor line should start moving to
the right. Make some noises and sounds into the microphone and watch how the Timeline at the
bottom of the screen will fill up with content.
During the recording keep an eye on the Input Volume control and the Timeline and adjust
the Input Volume Slider or the distance to the microphone if the recording is too quiet or
too loud.
 |  | Recording Volume too low: Analyzer Display will lack detail, and recording is barely audible during playback. Move the input volume slider to the right, or move closer to your microphone. |
 | 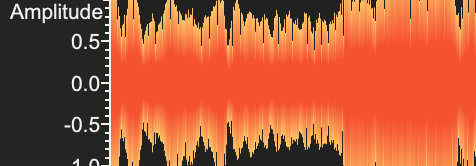 | Recording Volume too high: Analyzer will show clipping artefacts (this is worse than the volume being too low!). Recording sounds screetchy and distorted during playback and is unusable. Move the input volume slider to the left, or increase your distance to the microphone. |
 | 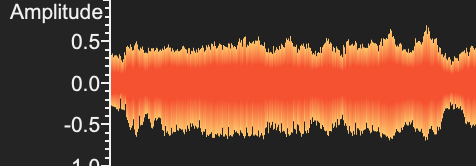 | Recording Volume optimal:Signal uses most of the available dynamic range without clipping. Analyzer will show best amount of detail. Sounds good during playback. |
Make some sounds into your microphone and adjust the recording level until it is getting
a strong signal without clipping. This means that the background of the input level meter
should never reach the red zone, and the content in the Timeline and/or Waveform should
never touch the upper and lower edges of the view.
If you are recording singing, be aware that the dynamic range of a trained singer can be
extreme. This means that singing can get very loud, and the input volume might need to be
lower than you think to prevent clipping and distortion of the recording when the singer is
singing high notes at high volume. In those cases, besides lowering the input volume, it
might help to increase the distance to the mic a bit, or to use a better microphone.
Now let’s try some singing. For example, click on a key of the piano keyboard, listen to
it, and then try to sing the same pitch. Fill up half a screen and then press
Space or click the stop button on the toolbar to stop recording. This should look
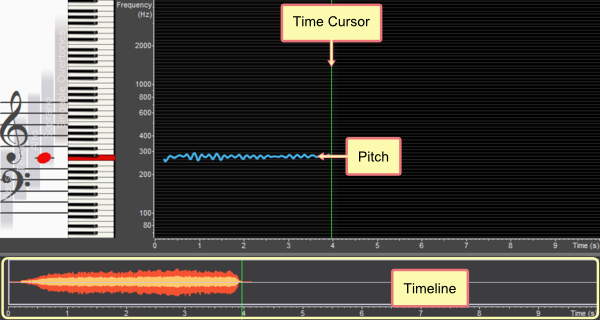
something like this:
The Timeline at the bottom shows the intensity (or volume) of your sound as a waveform
display. The horizontal blue line in the middle is the pitch of your voice. The vertical
green line is the Time Cursor. The Piano highlights the key that best matches the pitch of
the recording at the time where the Time Cursor is, and the Staff View shows the same key as
a musical note.
Now try to play some other notes on the piano keyboard, and record your voice to see
if you can sing the matching pitch.Then try to sing or whistle some melodies, and observe how the blue pitch line and
the notes on the piano and staff view respond to your sound.
